Saturday, August 4, 2012

Bananas About Peppers!

Sorry for the absence but honestly, I haven't been doing much BBQ lately.  With the insane temperatures, raising a 6-month old, and a busy summer schedule, BBQ has had to take a back seat lately.  So, this post will be a little different...

Recently, a coworker brought in some extra veggies, and I ended up bringing home some banana peppers.  I've never canned anything, but I thought this was a good excuse to start!  I love pickled banana peppers on sandwiches and stuff, so I was very interested in trying to make some myself.  The recipe and preparation is very easy.  I won't lie, I just used this recipe that I found on food.com.

2 pint size canning jars with lids
1/2 lb of banana peppers, sliced.  Remove the seeds and inner rib portions

2 cups white vinegar
2/3 cup white sugar
1/2 teaspoon mustard seed
1/2 teaspoon celery seed

Combine the vinegar, sugar, mustard and celery seed in a pan, bring to a rolling boil.  Remove from heat.  With the peppers already separated into the canning jars, pour the hot pickling liquid into the jars, stopping about 1/2" from the top.  Be sure that there is no liquid on the portion where the lid will go.  Tighten the lids until tight.  Store them for two weeks before enjoying. 

I only had four peppers, so I was able to cut this recipe in half, and it ended up being about perfect.  Plus, my wife had these tiny little canning jars that worked great for this too.  Here's a picture:


This picture was taken literally a few minutes before I typed this, so I too will be waiting two weeks before enjoying these peppers.

Since that's the only food news I have to share with you, let's talk about another one of my favorite things... BEER!  I figured I could start featuring a beer of the month.  To honor IPA day from this last week, we'll talk about what is currently in my fridge: Titan IPA, from the Great Divide Brewing Company.
 
Like most IPAs it has an aggressive hop flavor in the forefront, but this particular brew has very malty back end to it.  A little too malty for my taste.  Having said that, it is very good. True to form, I will go ahead and give it a rating, on a 0-10 scale.  With it's good balance of citrus and hopiness, it has a refreshing bitter taste.  However, the malty flavor that follows can make it taste slightly heavy.  Overall, I give it an 8.6/10.  

I guess I need a reference for my scale.  Here it goes:
0 - 0.9 = Is this beer, or urine?
1 - 1.9 = I'm not having a stroke, that's just my bitter beer face.
2 - 2.9 = I'd be perfectly fine if I never had another one.
3 - 3.9 = Good effort, but keep trying.
4 - 4.9 = I can see what you were trying to accomplish here.
5 - 5.9 = Hmm, I should probably have another one for a second opinion.
6 - 6.9 = Yeah, I'll definitely take another one.
7 - 7.9 = Mmmm, very satisfying. I'll be buying a six-pack.
8 - 8.9  = Dude, you have to try one of these.
9 - 10 = What a great beer! Now, go get your own before you drink all of mine!

Saturday, June 30, 2012

Come On Baby Light My Fire

Lately, I've been attempting to grill and smoke a little more naturally.  Now, it's not some hippie, epiphany that came to me or anything.  I think it's more of me wanting to get the best flavor possibly from my cooking, and attempting to save a few dollars in the process.  For starters, I have begun grilling with lump hardwood charcoal.  I will say, I'm definitely a believer now.  The flavor can't be beat, and it burns up nice and hot.  It's a little more expensive than you're run-of-the-mill charcoal, like Kingsford, but it's worth it to me.  One way to counter this extra cost, is to lose the lighter fluid.  Not only will you save money, but you also preserve the flavor and don't have to mess with that bitter, "gas" flavor that can sometimes transfer to your food.  Plus, I'm pretty certain it's not the best health decision to be inhaling those lighter fluid fumes.

You are probably thinking to yourself, "That's great and everything Monty, but this charcoal won't light itself on hopes and dreams".  Unless you are a mutant, or have super powers, this is accurate.  To light your charcoal, try making some fire starters!  They are cheap, easy to make, and can be made with only three ingredients.  Get yourself some egg cartons, dryer lint, and some candle wax.  Alright enough with the chit-chat, and onto the pictures.

First, save up an egg carton or two, and cut the top off.  Keep it in your laundry room, and every time you do the laundry, stuff the dryer lint into each of the holes.  Be sure to fill up each hole so that the lint overflows a little.  The lint will compress a bit when you pour on the wax.  


While you are accumulating your dryer lint, stop by your local craft store and pick up some canning/ candle making wax.  You can typically find boxes like this for like $6.50 or so. 

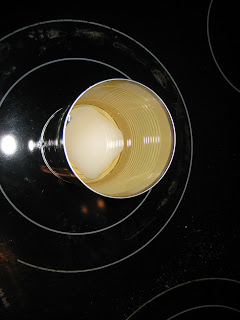
Once you have gathered enough dryer lint, you can begin the melting process.  If you have an aluminum can sitting around, this works pretty well.  But, if you have something that pours easily, that would work even better.  Begin by melting the wax one bar at a time.

Once it's completely melted, carefully pour the wax over each of the lint filled sections.  Here is where a heating vessel that pours well would be beneficial.  Looking back, some hot-pot holders would have worked a little better than holding a wrench awkwardly. 

Make sure to cover all the lint with wax.  It's OK if the wax ends up being applied a little heavy.  Let them cool until hard, and then cut them up into individual sections.  Just light a corner, and watch them burn!  These work great for starting a charcoal in a chimney starter, a fire place in the winter, or it works really well for a wood burning smoker too! :)  Enjoy, and get out there and grill!


Monday, May 28, 2012

Memorial Day Meat-Fest

 In preparation for Memorial Day, my wife and I decided to fire up the smoker again, and BBQ some meat. In an effort to possibly save a little money, we decided to smoke a couple chickens and a meatloaf.  First up, the chickens!

Saturday night, I made up another brine for the chickens to soak in overnight.  For me, I like to get enough warm water to completely cover the chickens, and then an even ratio of salt and sugar.  Usually somewhere between 1/2 cup to 1 cup of each, depending on how much water I'm using. I also put in a few spices as well as about 1/4 of an onion cut into large pieces.  I like to stuff the onions into the cavity of the chicken to try and get some extra flavor. Here's a shot of the birds getting ready to take an overnight bath.  

Fast forward to Sunday morning, after church, we stopped by Lowes and got some cart wheels, nuts, bolts, and washers, so I can finally make the smoker mobile.  Since it weighs so much, it will be nice to finally be able to move it by myself!  Big thanks over the last couple months to my dad, my neighbor, and my father-in-law for helping me move it in and out of my garage so many times.

Back to the meat!  Before I ate lunch, I prepared my meatloaf.  I base my recipe off of the one in the Better Homes and Gardens cook book.  I'm sure any recipe will do.

Once it is in it's loaf form, it's time to break out the bacon!  Since it cooks in that smoker for so long, it's good to have an extra source of fat to render down, and keep the meat moist.  What better way to do that, that with a little bacon. I just wrapped some bacon around the top, and secured each piece with a couple tooth picks.  Once again, big thanks to Cloud's Meats in Carthage, MO for the bacon.  Yum!  I would suggest putting it in a dish of some sort, or you will have a lake of grease in the bottom of your smoker.  Plus, it helps keep the meat loaf moist.

 Here's a shot of the birds and meatloaf cooking away. As you can see, I have plenty of room for a lot more meat!

 The meatloaf turned out to be one of the prettiest looking things I've ever smoked.  It smelled pretty fantastic too.

We cut it up and ate that for dinner.  I will say, I went a little conservative with the salt/seasonings with the meatloaf, because I thought the bacon would at more saltiness than it did.  But, it had great smoke flavor, and didn't dry out too bad. 

The chickens turned out great.  I didn't take any pictures of them all done, but I've already pulled all the meat off, and separated them for later consumption.  We will be looking forward to smoked chicken wraps, fajitas, enchiladas, etc. this week. 

Thanks for reading.  Get out there and enjoy the nice weather when possible.  Now that school is out for the summer, get those weekend grill-outs going, and get the neighborhood involved.  Nothing brings people together better than good food.  Well, beer is probably a close second... so why not offer both?  :)  Have a great week!

Monty

Wednesday, May 23, 2012

Spring Time Smoking!

Sorry for the long delay, but we're back with some more BBQ sessions with the new smoker.  So far, I'm still loving the Double Barrel smoker.  After the first couple smoking sessions, I have learned a few things about it.  First off, the slightest adjustments can have large effects on the temperature.  For the first hour or two, you really have to keep a close eye on it, especially if it's a windy day outside.  If a big wind gust kicks up, it can stir up some flames, causing the temperature to shoot up.  Second, I have hot spots.  I plan on addressing this in the very near future. Lastly, that boy is heavy!  Eventually, I plan on permanently planting the smoker in the back yard.  But for now, it is quite the chore moving it from the garage, to the driveway, and back. 

Onto the pictures.  Here are some shots from the Easter meat-fest.  Here's a shot of me prepping the ribs.  If you spread a thin layer of yellow mustard, it helps the rub stick to the ribs, without effecting the flavor at all.  I've heard the vinegar also helps tenderize the meat while it smokes, but I can't tell much difference personally.


Here's a shot of the ribs all rubbed up and ready to go.  You can also see my pork shoulder off to the left, that I've already rubbed prior to the ribs.


After it was all cooked, and it sat for a few minutes, I went ahead and pulled the pork. It's much easier when the bone pulls straight out with no meat attached. :)  If this doesn't make your mouth water, you might have malfunctioning saliva glands.


April was a brutally busy month, with bowling tournaments, taking care of our 3-month old (now 4-month old), etc.  Fast forward to this last weekend, my parents came to visit, so I wanted to smoke us some meat.  I did a couple of racks of ribs, as well as a whole chicken.  Unfortunately, I kept forgetting to take pictures of the process, but here's a shot of the smoker rolling along. 


Everything turned out great.  The ribs were tender and coming off the bone nicely, while still maintaining their structural integrity while cutting them up.  Even though the chicken had to finish off in the oven while we ate the ribs, I can honestly say, it was the star of the show.  I brined it overnight, then rubbed it down with a fantastic Lemon Pepper Poultry seasoning from a local spice shop.  It was moist and juicy, with tons of flavor.  I've been enjoying the left overs all week. 
My dad was looking for some local spice shops for us to try out sometime, and we found the Slice and Spice over in Spring Hill, KS. What a treat this was.  We decided to drive over to Spring Hill, and pulled up to this tiny little shop with hardly anything on the shelves.  But, the gal working there was super nice, and helpful.  I ended up getting some Hungarian paprika for a number of different rubs, the aforementioned Lemon Pepper Poultry seasoning, and some Lime Pepper seasoning for the grill or whatever.  Not only was it nice to get some great new seasonings to cook with, but we met a wonderful, helpful person, and helped out a local business. I'm sure the seasonings they offer are much fresher than the stuff you would otherwise buy at your local grocery store.  Check them out at http://www.sliceandspice.biz/


Along with the ribs and chicken, I tried a new recipe that I heard on a new podcast that I've found.  If you have the means, I suggest checking out the Smokehouse Podcast.  You can find it on iTunes, or head over to http://www.smokehousepodcast.com/ and listen to any of the episodes you want.  Back to the recipe...  It's called Bacon Candy.  Yes, it's just as delicious as it sounds. 


In no way, shape, or form is this a healthy dish, but man, it's tasty.  Here's what you need for Bacon Candy (Again, thanks to Curtis from www.smokehousepodcast.com for the recipe):
  • Around a pound of thick cut, quality bacon. (thanks to Cloud's Meats, in Carthage, MO)
  • 1/2 Cup of Brown Sugar
  • 1/2 Tsp Cayenne (I used slightly less than this, and it was still plenty hot for my taste.  Next time I'll use 1/4 Tsp)
  • 1/8 Tsp Cinnamon
  • 1/8 Tsp All Spice (I used Nutmeg, and it seemed to turn out okay)
Shake up all the dry ingredients in a gallon freezer bag, then drop in your bacon piece by piece, making sure to coat each of them.  Be sure to put them onto your smoker/grill immediately, or else the sugar will begin to liquify and your ingredients will begin to come off the bacon.  Smoke it at 250-275 degrees for 2-2.5 hours, or until the bacon is fully cooked and caramelized. You can also do it in the oven, at 350 degrees for about 25-30 minutes.  Be sure to flip it half way through.


You can see mine got a little well-done, thanks to the hot-spots I have identified in the smoker. Like I said before, this will be addressed very soon...

Thanks for reading, and keep on smoking!

Saturday, March 17, 2012

Project: Smoke-Stacked - Part 5: The Maiden Voyage

A lot has gone down since the last update.  Let's cut to the chase, and get to the pictures. 

Thanks to the wonders of Amazon, I was able to find the perfect thermometer for this smoker.  The maximum temperature is a little lower than most grill thermometers.  It's focus is clearly made to cook in the 200-250 range, right where you want to be when smoking. Here it is installed on the door.

Here's a close up shot.  You can see that it clearly has the different temperature ranges marked.  My goal is to be as close to 225 as possible.  More on that later...

Here's a shot of the smoker mostly assembled, with the stove pipe attached.  Starting to look pretty good!

Here's a profile shot, as well as a view of my messy work bench. 

Next was time to install the handle.  I had to trim down the brackets a little bit, for it to fit between the barrel ribs.  It turned out pretty well, and functions great!  When fully opened, the handle rests right up against the stove pipe. 

After a couple of really frustrating hours, I managed to somehow get some 6" aluminum ducting between the two barrels, connecting the dampers of the bottom barrel, to the collars going into the top barrel.  Considering my barrels were not the same shape to begin with, it made it extremely difficult to align the holes for the collars.  If you ever decide to build one of these yourself, MAKE SURE to get three, identical 55-gallon drums.  You will save yourself a lot of frustration in the end. I don't have any pictures of the ducting connecting the barrels.  It looks like garbage, but hey, it works!

So, this brings us to the maiden voyage.  In the morning, I moved the smoker out to the driveway, and loaded up the bottom barrel with my bricks.  I wanted to make sure to make a channel that my fire basket will sit on.

Here's a shot of my fire basket all loaded in.   You might not be able to see in the picture, but the basket is about 10" in width. (It barely fit in the stove door)  This allows the fire basket to sit about an inch and a half above the bricks, allowing air to get under the charcoal and wood. 

Thanks to the stupid ducting issues between the barrels, I didn't have time to season the smoker the night before the first cooking session.  So, I had to fire it up early, coat the inside with vegetable oil, and try to get it partially seasoned before the ribs went on.  I loaded her up with a couple of chimney-fulls of charcoal, and plenty of chunks of wood.  Here's the evidence, that my smoker works!

After a couple hours, I sort of knew what I had to do to keep my temperature right around 225.  So, once I had it down, I packed some rub on the ribs, and threw them on the smoker.  Here they are, smoking away. 

I ended up using quite a bit of white oak, and cherry wood.  I must say, they turned out great!  They maintained their structural integrity when picking up, but the meat came clean off the bone.  I was also able to achieve a very good smoke ring on the meat.  I apologize I don't have any pictures of the finished product, but I was very excited to eat them.  Taking pictures was the last thing on my mind, once they were done. 

Stay tuned for more adventures with the new smoker.  We're just getting into the prime BBQ season, and I intend on practicing plenty more this summer! 

Sunday, March 11, 2012

Project: Smoke-Stacked - Part 4

I only have four new pictures to share in this week's update, but a lot more work has been done between the pictures.  This week, I got very familiar with the paint brush, as I painted the exterior of every piece that will be involved with the smoker.

Here's a shot of the two main barrels, after their first coat of paint: 
 

After a second coat of paint, it was time for reassembly.  This is probably the part of the build I've been looking forward to the most.  There is just something great about actually seeing what the finished product will look like.  Here is the bottom barrel, all dressed up, and ready for the dance. I've got the stove door, both dampers, the bottom feet, and the top barrel support feet attached.  

 After the bottom barrel was ready to go, I just set the top barrel on top, so I could get the two collars on, as well as hang the door.  I still need to cut some aluminum to fill the gap between the bottom barrel dampers, and the top barrel collars.  There is about a 2" gap to fill in.

 Here is a close up of the hinges I used to attach the door. Aside from a very small minor glitch I'll have to resolve, this system looks like it's going to work well.  I used some T-hinges, but had to bend the long part, to accommodate for the curvature of the barrel.  Thanks to me extensive history with video games, I am proud to say I had ample thumb strength to bend them,

The only things left, are to attach the handle, the 3" sections of aluminum I need to connect the two barrels, attach the exhaust collar, and then attach the stove pipe and topper.  Then I can load it up with bricks, bend up my piece of expanded metal for a firebox to sit on top of the bricks, then we will be really to light it up! 

Sunday, March 4, 2012

Project: Smoke-Stacked - Part 3

 After another productive weekend, we are getting closer to being done.  My parents came to visit this weekend, so my dad was able to help me quite a bit on Saturday.  I didn't get as much done on Sunday as I had hoped, but we're getting there.
So, on with my dad offering his help, we were able to cut out the holes in the bottom of the top barrel, as well size up, and mount the angle iron in the barrel which will be used to hold the cooking grates. 


Here's a shot looking straight down through both barrels.  

I wanted to make sure my cooking grates would fit and everything, so here's a sneak peek at the 22"x33" cooking surface. 

After doing a little research online, and reading from others that have built these same designs, I think I might need to have an additional source of air for the fire barrel.  My buddy Erik also indicated this would possibly be an issue.  So, I decided to make my own air intake on the backside of the fire barrel, opposite of the stove door.  First, I drew circles to cut out on a scrap piece of metal (the piece I had cut out for the stove door), and drew out a design that I would be able to bend a little handle for, and be able to rotate around 360 degrees.  After cutting it all out, I traced the holes onto the fire barrel, and drilled out matching holes on it.  So, after I get it all attached I can regulate how ever much air I need from both ends of the fire barrel. Here's a shot of the plate lined up with the holes in the barrel.

And here's a shot of the plate spun 180 degrees, closing off the holes.

I don't have a picture, but I was also able to cut out the door.  Here is a shot of the door after being painted.    

Unfortunately, I wasn't able to get anything else painted, but everything else is literally all set up and waiting to be painted in my garage.  It's supposed to be pretty nice this week, so hopefully I can get it done soon!  Stay tuned for further updates.